 (stolen from the vfaq )
Disclaimer: I accept no responsibility for anything done to your car. This is performed at your own risk, and I am not responsible for anything that happens. This is for reference use only.
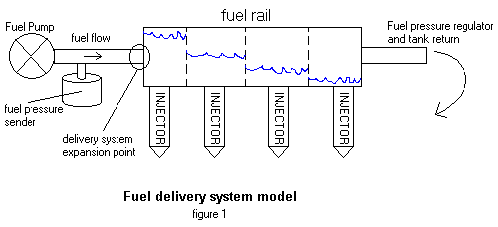
There are hose kits out there for fuel return lines to aftermarket fprs, but I went to a local plumbing store and put together my own kit with brass -6an flare fittings, 3/8" ID hose and rubber o-rings on the flare fittings that connect to the fpr. Just by knowing those three parts you already know how to put it together. This tutorial will outline how to run plumbing from the fuel rail to the regulator and then to the return line.
If you have a walbro 255lph fuel pump, an aftermarket fpr is pretty much a neccessity. Our stock FPRs are way too weak, and in most cases too old, to keep up with the pressure generated by a 255. Almost everyone can get away with a stock FPR against a 190 though. The reason to get an aftermarket adjustable fuel pressure regulator, is to maintain healthy a/f ratios along side with the introduction of a turbo or supercharger, different engine displacement, different injectors, etc.
With a high flowing fuel pump, the stock fpr is easily overrun. Because the fuel curve is not expected, the ECU has a harder time trying equalize the fuel maps. Then with the introduction of boost, the stock fpr is in no way capable of handling this efficiently. Aftermarket FPRs like the Aeromotive and SX regulator reference boost at a 1:1 ratio, raising fuel pressure 1psi for every 1psi of boost.
(stolen from the vfaq )Turbo eclipses use a boost referencing FPR. It would theoretically be cheaper and easier to install the turbo eclipse FPR, but it doesn't fit. Non-turbo eclipses (and galants for that matter) use a "standard" FPR that doesn't reference boost. This is the flaw with keeping the stock FPR on an n/a car that goes turbo. Even if the turbo eclipse FPR would bolt right up, it's not going to flow nearly as well as an aftermarket FPR. With an adjustable fpr, you can control the fuel thats surging through your rail. More can be read at the vfaq.
---------------------
All pictures can be clicked for a larger version.
Parts needed:
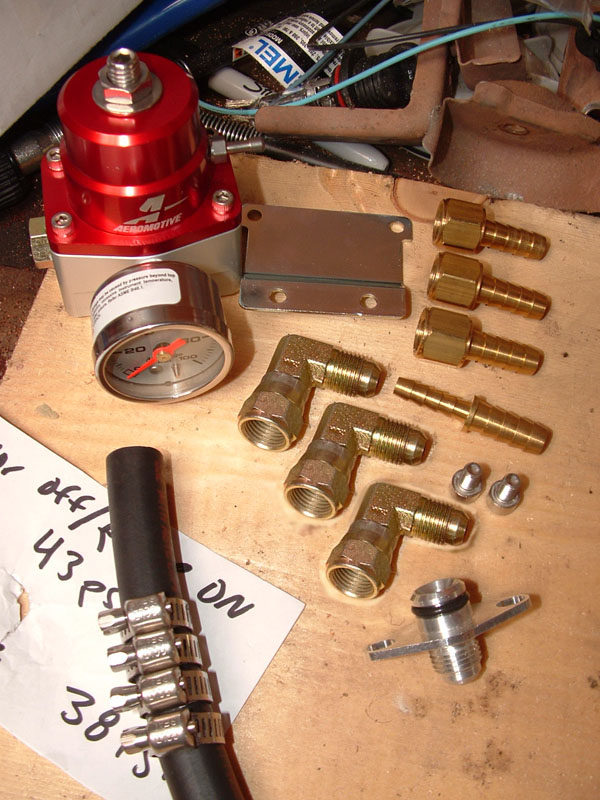
+ Adjustable FPR - Aeromotive in this case
+ Fuel pressure gauge - 1/8" NPT for Aeromotive and SX FPR
+ about 18" of 3/8" ID rubber fuel hose
+ -6an Fuel rail outlet adapter
+ about 6 hose clamps
+ 3 -6an female to 3/8" male barb adapters
+ 3/8" barb to 1/4" barb adapter
+ -6an male plug
+ 3 -6an female 90* to -6an male adpater
+ 2 -6an male unions (not pictured)
+ O-rings for both male unions and -6an plug
To begin, depressurize the fuel system. I like to run the car with the fuel pump disconnected until it stalls. You will still spill fuel from the lines when you disconnect them, but it won't be pressurized.
 Mount the FPR somewhere so you know how much line you need to run. You can remove it to attach the fittings, but set it up somewhere for reference.
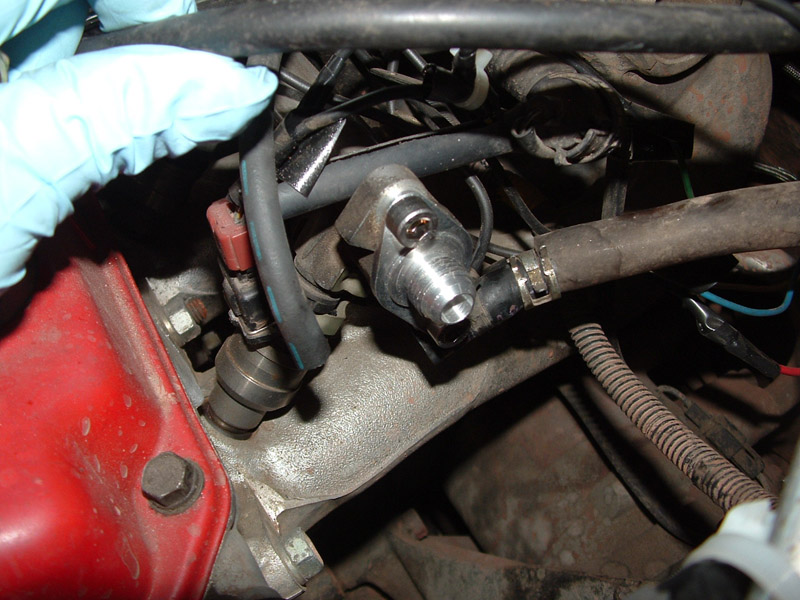
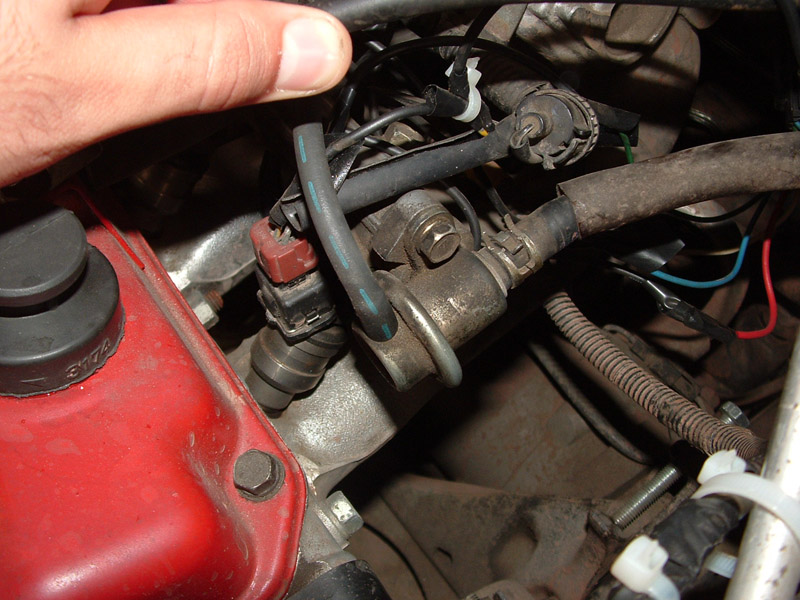 Stock FPR setup. The return line runs off to the right side, and the vacuum hose (blue disconnected lines) goes up to my thumb back to the intake manifold.
 Disconnect the vacuum and fuel return line. Remove the stock FPR.
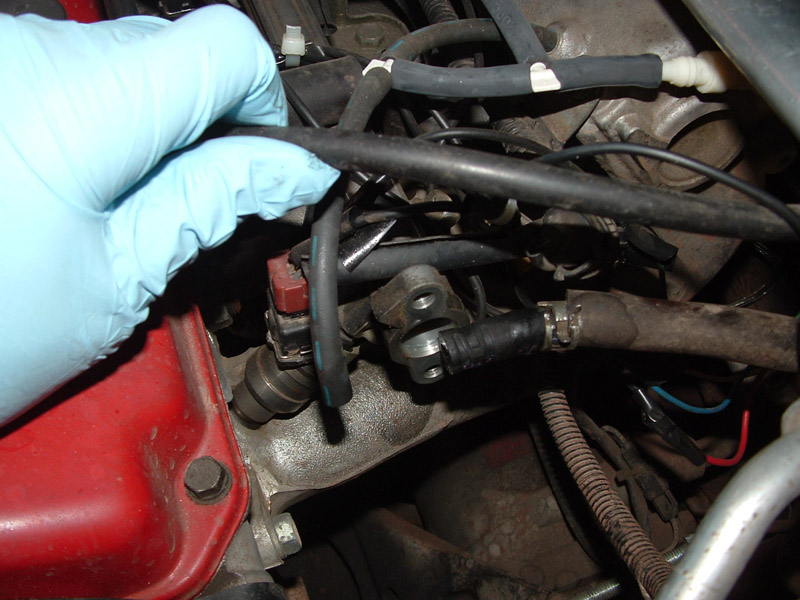
 Install the -6an fuel rail outlet adapter. Apply a very thin layer of oil to the o-ring on the adapter that sits inside the rail.
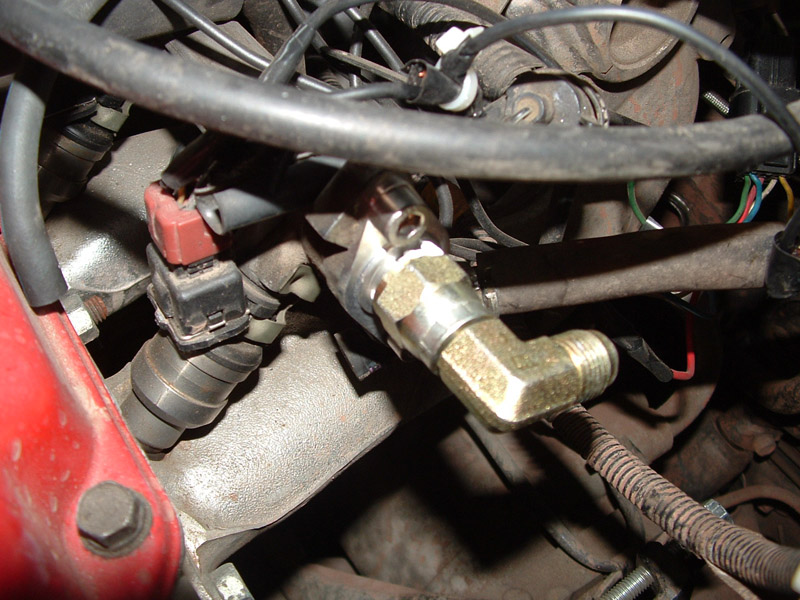 Install a female to male 90*. Its nice if they have a swivel end on one side like the one pictured. Now everyone I've talked to about flare fittings says you don't have to use teflon tape on the threads. Flare fittings seal on the cone not the thread. I use tape anyways, since its cheap and can't hurt. Make sure it's made for gasoline.
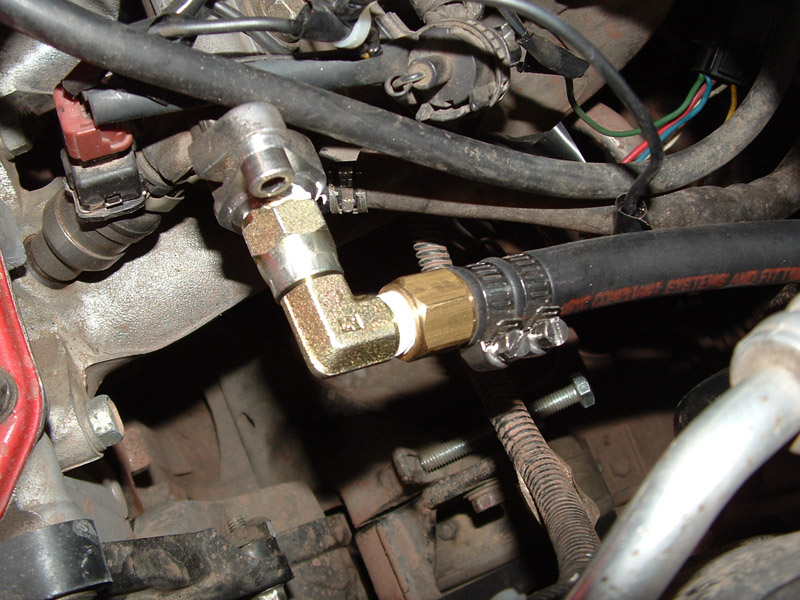 Now put on some 3/8" hose. Two clamps for uber clampage. Run enough hose to go to a side inlet port on the FPR, then run about an inch more. You want to leave some slack for engine movment and vibrations.
 Fasten one side of a -6an male union with an o-ring (not in picture yet) to a side inlet port, then screw on the female side of a 90* bend, the male side meets the female cap for a 3/8" barb fitting, as pictured.
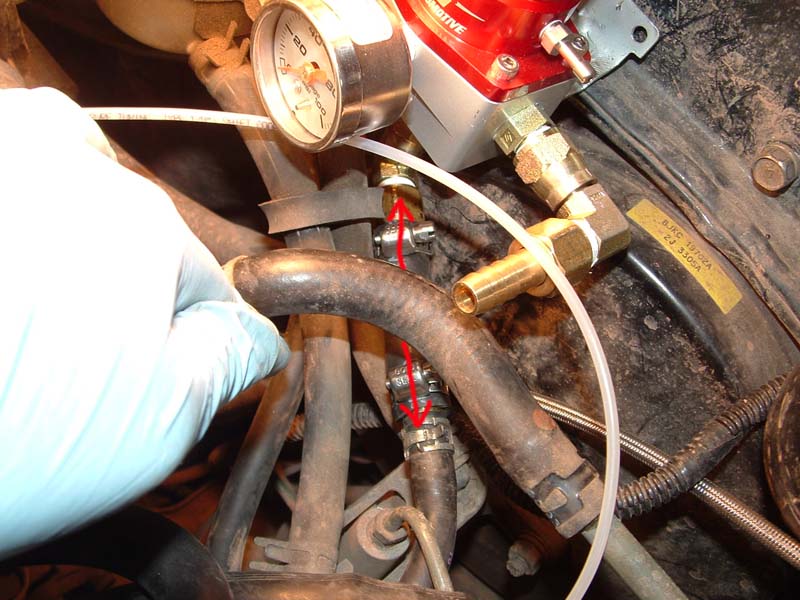 The return line doesn't have to be this complicated, but the plumbing goes something like this for me: -6an male union --> female 90* to male --> female end cap to 3/8" barb --> 3/8" hose --> 3/8" barb to 1/4" barb --> OEM rubber return line. Don't forget an o-ring on the male union where it meets the bottom of the regulator
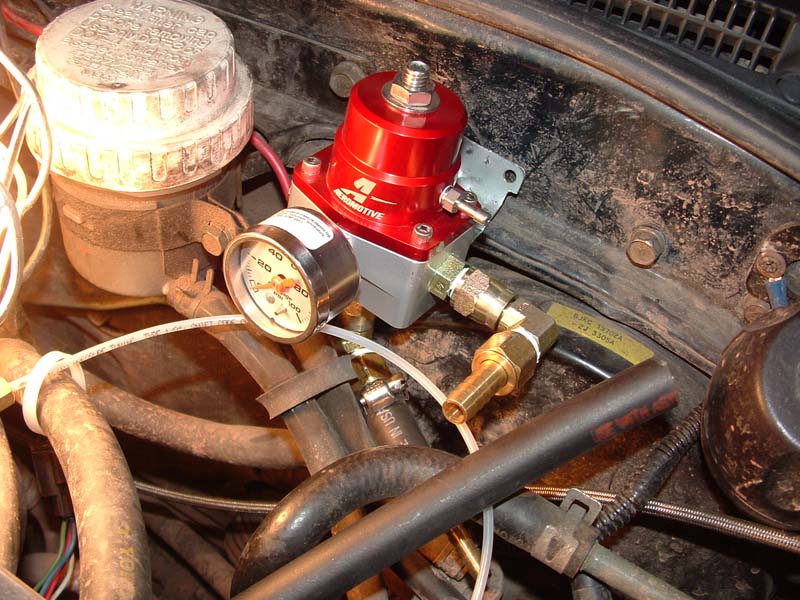
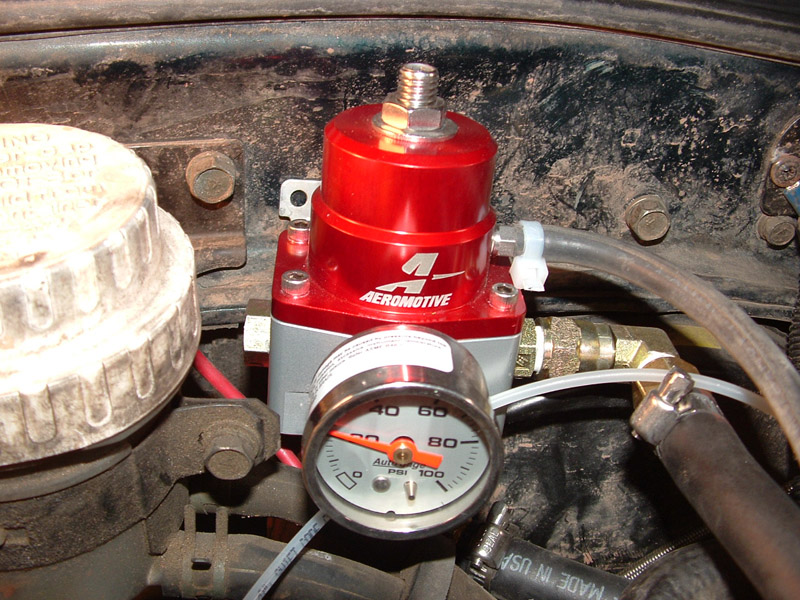 Mount the 3/8" hose from the fuel rail to the side of the regulator, and screw in the -6an plug with an o-ring. Connect the vacuum line to the top as well.
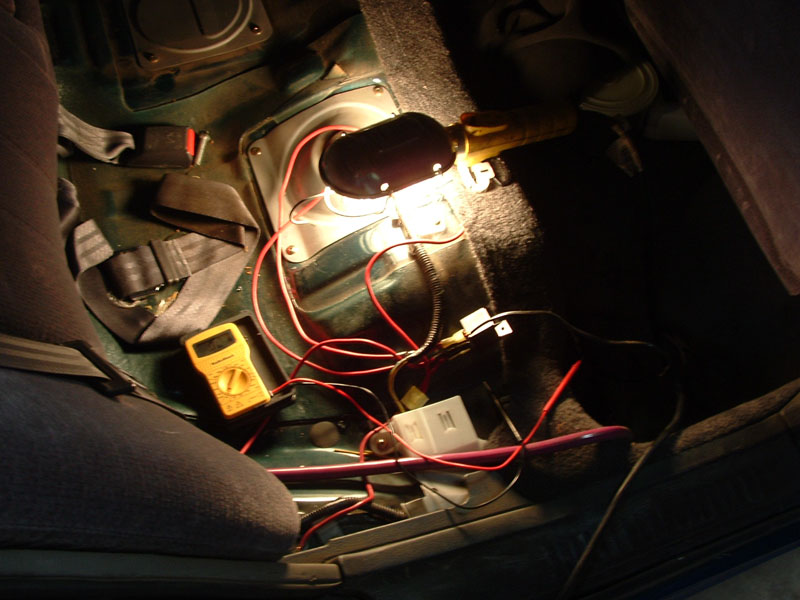 Now you have to set the base and idle pressure on the regulator. The system must be pressurized by turning the fuel pump on, but not the motor. OR you can turn on the motor and pull the vacuum line off the regulator. Rather than using the fuel pump check terminal, I crossed the main power wires at the relay to pressurize the system without turning on the motor.
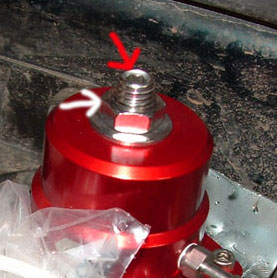 With fuel flowing through the system at full capacity, check for leaks at all connections. To set the pressure on the regulator, loosen the top nut (white arrow) and insert an allen key into the adjustment stud (red arrow). Turn it either way to set the pressure.
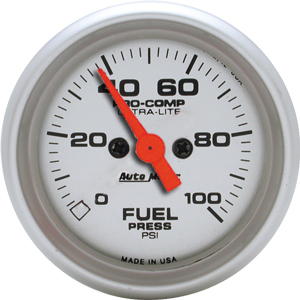 With both the motor and fuel pump running and all vacuum lines connected, the service manual specifies the fuel system should be set to 38psi.
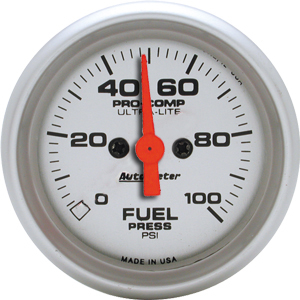 With only the fuel pump running [or the motor running with the vacuum line disconnected] the service manual specifies the system should be set to 48-50psi
Circle your neighborhood a few times and check for leaks again. A few days later check it once more to ensure the o-rings made a complete seal against the regulator's base. I stock a fire extinguisher underneath my seat now, these have been known to spring leaks from time to time.
-----------------------
After re-tuning all the hi-throttle settings on my s-afc2, I've noticed a few major things. The turbo spools up smoother now, and doesn't engage so violently like a shot of nitrous. Exhaust temps have lowered significantly as well. After another day of letting everything break in and settle down more, exhaust temps got even a little lower. I made these observations on the same highway with the same ambient temperature cruising at the same speeds. Under WOT and full boost, the exhaust temps arn't so eager to climb up as they were before.
All comments regarding my dirty engine bay are simply ignorant.
peanotation@gmail.com