01/03/2006
Unless you bought a GS, no 94-98 Mitsu Galant has a rear sway bar. Why should you want one? The difference it will make will leave you speachless.
So how do sway bars work? Suppose we are making a hard right turn. The left side of the car's suspension compresses while the right side expands. Sway bars try to eliminate body roll by moving force from one side of the body to the other.
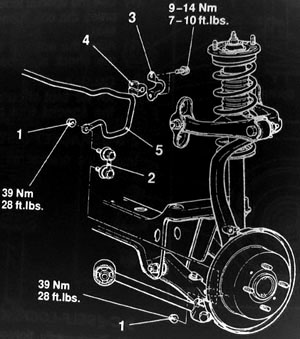
The sway bar (#5) is connected to endlinks (#2), which are then bolted to the lower front arm. As the arm rises, it pushes up on the endlinks which push up on the sway bar. It rotates slightly and pulls the other side's front arm up, to try to equalize the wheels' height and thus, eliminate body roll. Some sway bars flex under the torsional strains that they undergo, and upgrading to a thicker one is a common modification. The thicker the sway bar, the more flat the car will be through turns. .
Rear sway bar diameters:
94 Galant GS - 12mm
2G Eclipse GST - 15mm
2G Eclipse GSX - 18mm
If you've ever wanted to revolutionize your handling, then a sway bar is just what you need. All pictures can be clicked for larger version.
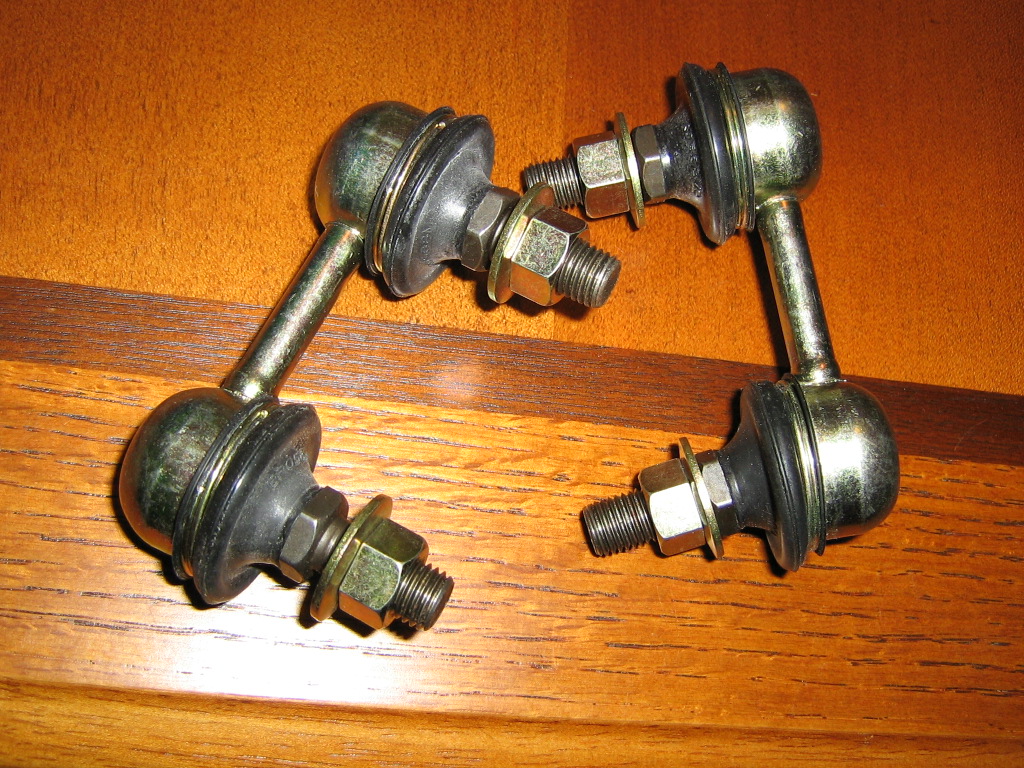 Endlinks & nuts - 2 endlinks are needed, off any Eclipse turbo or Galant GS. The nuts are 14mm with attached washers that can spin freely. Parts #2 and #1 in the diagram above.
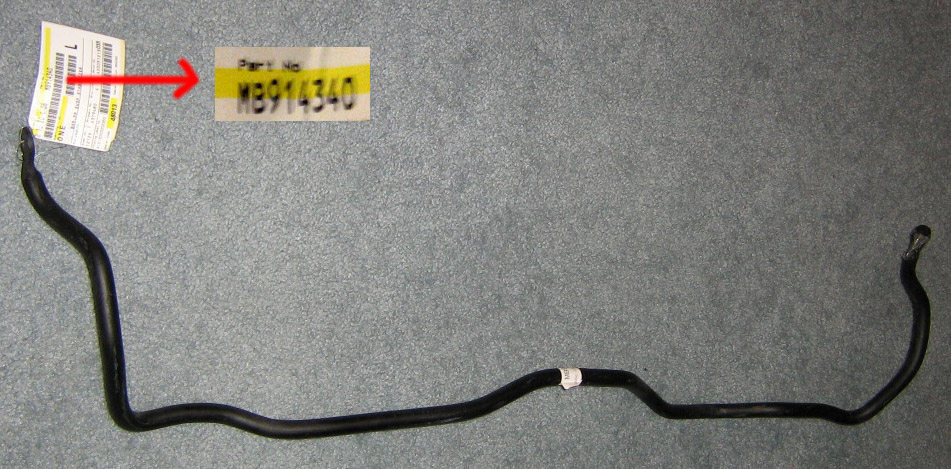 Sway or "Stabilizer" Bar - This is an 18mm bar for a 2G GSX. A GST or 7G GS bar will work as well. Part #5 in the diagram above.
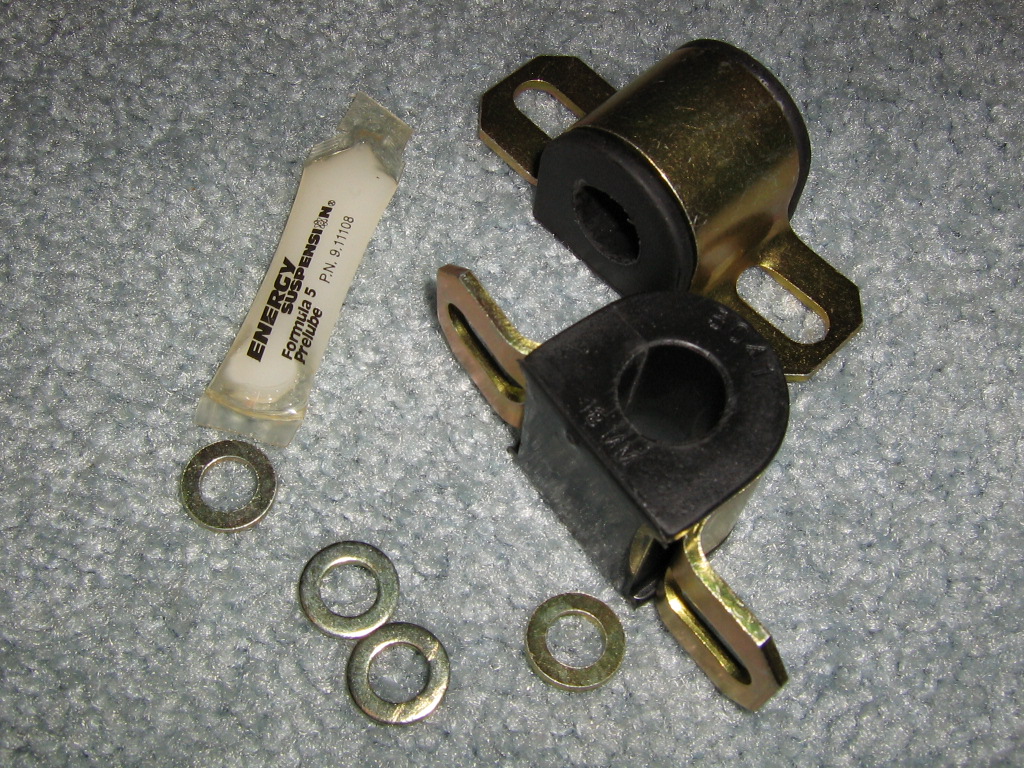 Bushings and Brackets - Aftermarket ones like these from Energy will be much stiffer than stock, allowing the sway bar to respond quicker due to less play in the bushings. These bushings are 18mm. If you opt to go with a GST rear sway then you will need 15mm bushings. Make sure to get the right ones! NOTE: When ordering aftermarket bushings from Energy Suspension, if you select ones for an eclipse you will ONLY get the bushings. If you order UNIVERSAL sway bar bushings in the size you need, you will also get the corresponding brackets. If you opt to use stock bushings you will need to purchase the brackets seperately. Parts #4 and #3 in the diagram above.
 Lower front arms - 2 lower front arms are required, and they are symmetrical like the endlinks. The stock Galant front arms don't have the holes for the endlinks to bolt onto as pictured here. Also, the eclipse arms seem to be reinforced underneath, click here for a comparison. Part #5 in the diagram below.
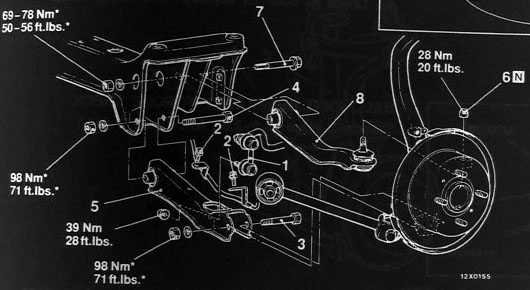
 First, replace the front arms on both sides. You will need to remove the bolts at the crossmember and hub (bolts #3 and #4 pictured above), both are 17mm with 17mm nuts. Don't lose the washers.
 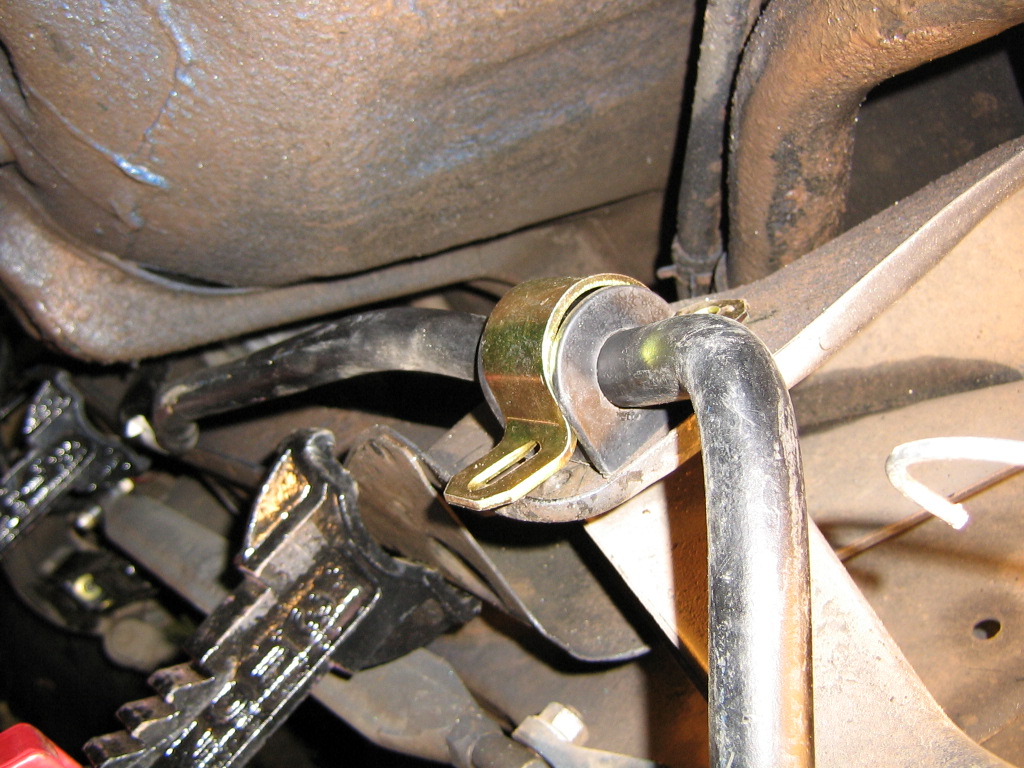 Now to install the brackets, bushings and sway bar. Because I'm using an oversized bar, my problem is obvious. Stock brackets fit with no problem, but the 18mm bushings extend the bracket over the edge of the crossmember. Solution is to cut the lip off the crossmember.
 Cut off with a dremel.
 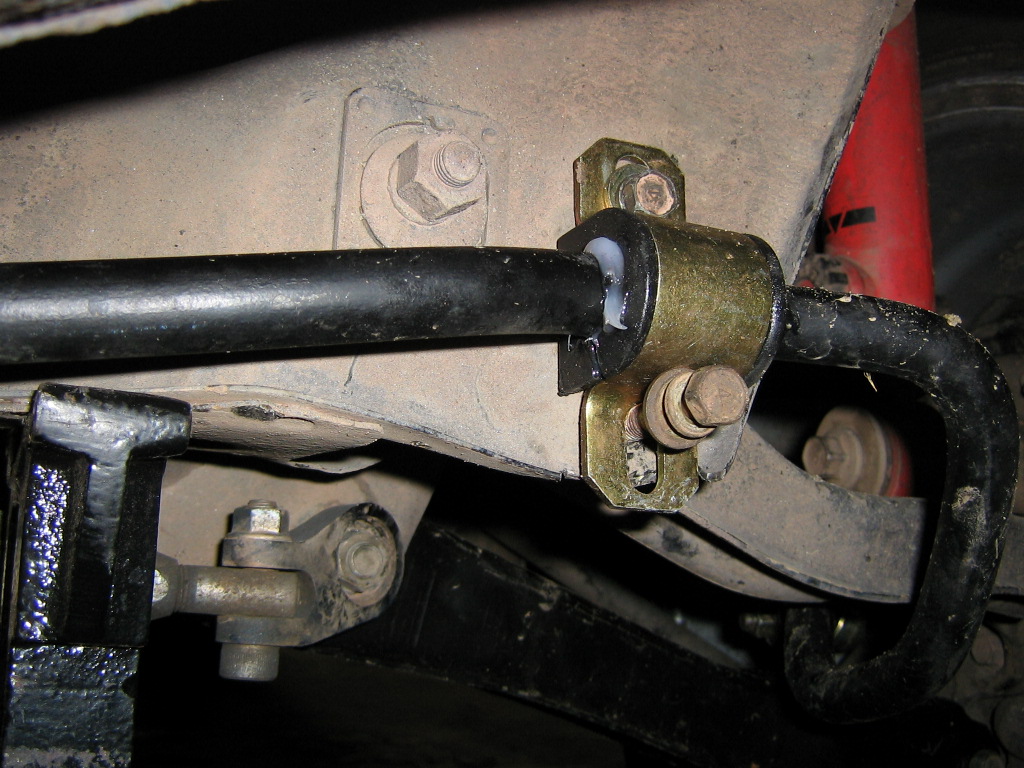 With the crossmember trimmed down it's now time to install the brackets and bar for good. Apply grease to the inside diameter of the bushing. The bolts are 12mm. Here is where my next problem came up. Because the bar is too thick, the two holes on the bracket are further spaced apart than the two threaded holes in the crossmember. By itself, the bracket does not line up with the holes. It's simply too big. Alas, my method to get everything to fit involved pushing up on the bushing with the floor jack and/or vice grips. I compressed the bushing a little bit and forced the holes to line up. I had to use a longer bolt so I could pry up on the bushing right before I threaded it in. Do whatever works for you. ~ Complete this process on both sides.
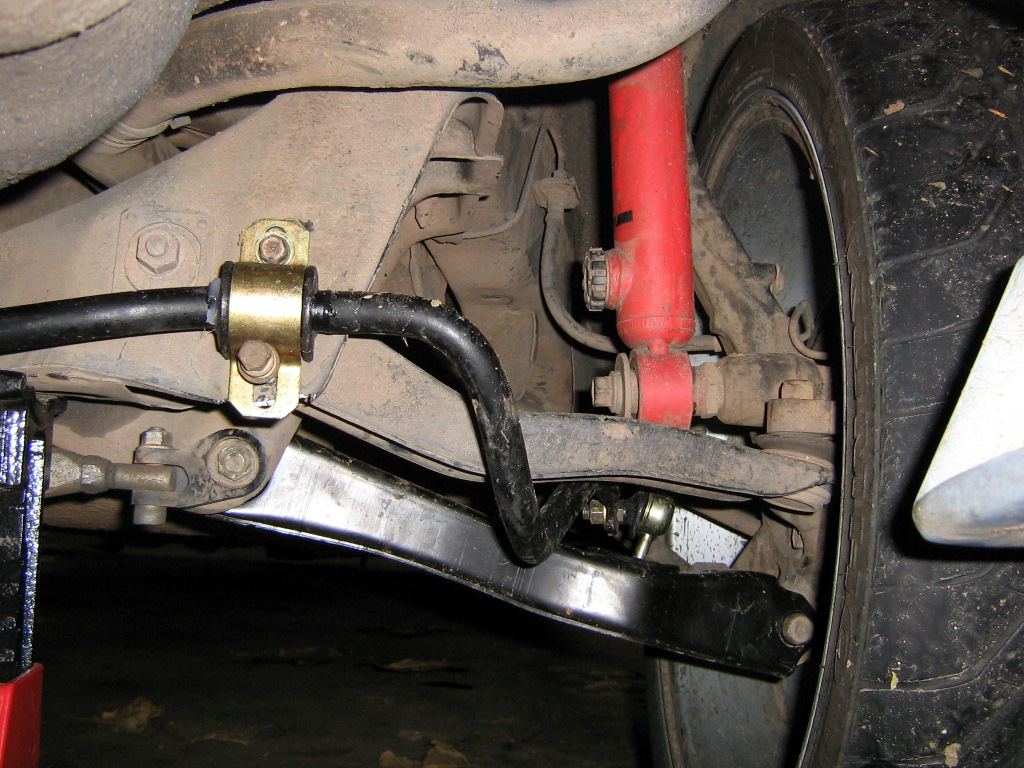 Install the endlinks to the sway bar. The nuts are 14mm. In the raised position, the endlinks will look unnatural being angled so sharply. Once the car is lowered they will straighten and form a perfect 90* angle to the sway bar and front arm.
 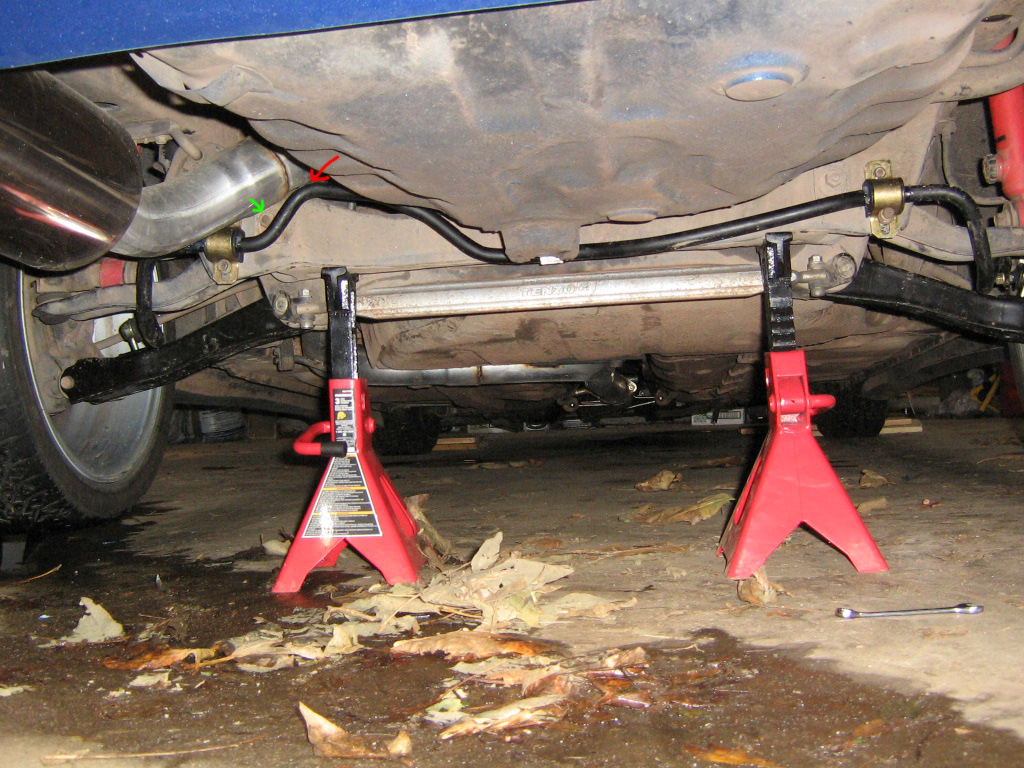 Complete. More problems: Indicated by the red arrow, the GSX bar hits my 3" exhaust. It actually pushes up on it a tiny bit. So far, no noises. Also, the bar also hits the nut pointed to by the green arrow. This made putting the driver-side bushing/bracket on a little bit harder.
 The install took me roughly 3 hours thanks to the rain, but it's relatively simple. I only used 12, 14 and 17mm wrenches and sockets, plus a few misc wrenches and pliers to help force the brackets on.
Because of all the inherent problems with the 18mm bar, I suggest a smaller bar be used. The GST sway bar traces the rear crossmember quite accurately, and doesn't have all the wierd bends the GSX bar does for its AWD system. This will hopefully prevent the interferance problems and make it easier to bolt down the brackets. This shouldn't require a break-in period, so I went right out and start pushing it through turns. Unbelievable.
peanotation@gmail.com