This took me about 4 days of constant work, and I had all the parts I needed except for the a starter. A friend to help is important at times, mostly when getting the transmission in and out of the car for your first time. There are a lot of nuts and bolts, I must have counted over 6 different lengths for the same diameter bolt, so keep track of them.
Click on the pictures to enlarge them.
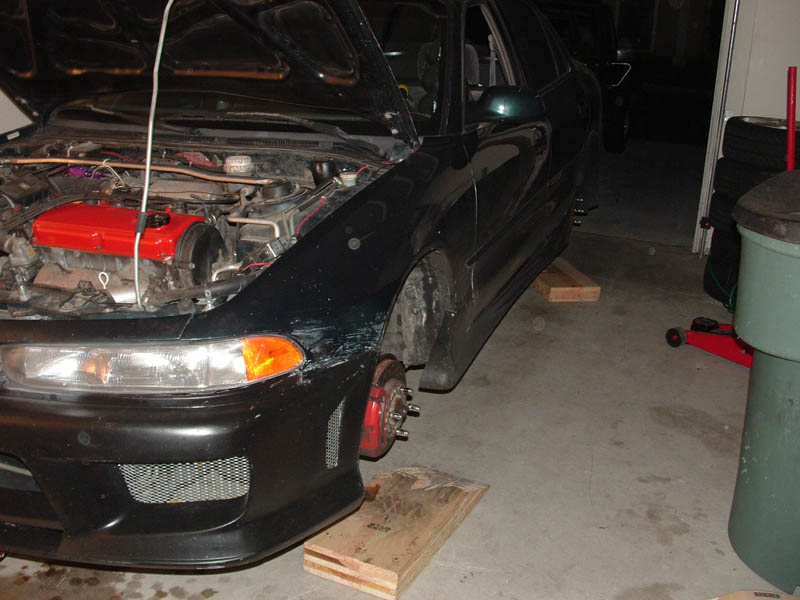 First, disconnect the battery and raise the car and put it on jackstands. I used four in case I had to leave it up for a while.
 Drain the the tranny fluid. Remember there are two drain plugs (yellow arrows).
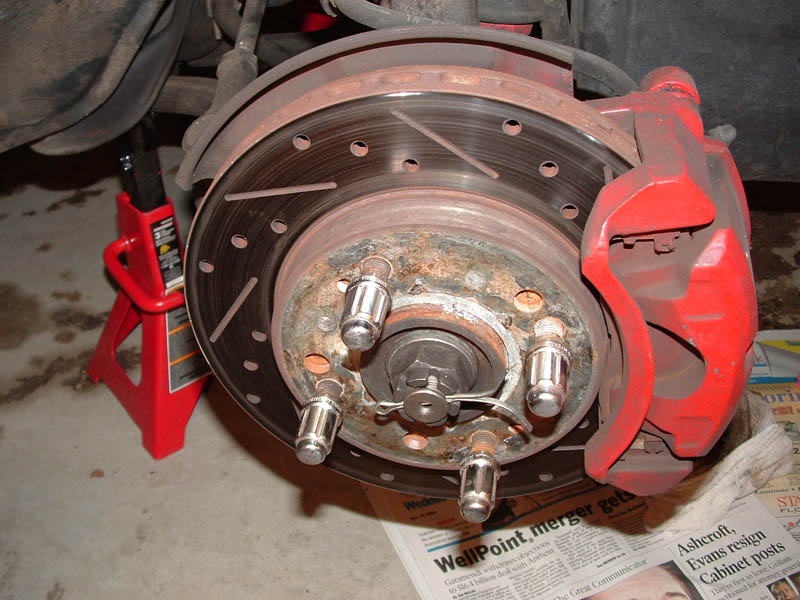 Remove the cotter pins at the end of the axles that prevent you from getting to the axle nuts.
Remove the axle end nuts with the 32mm socket. You will have to get someone to press down hard on the brakes. I had to put my font wheels back on and lowered the front enough so the wheels touched the ground, and loosened the axle nuts that way. Try the brake method first, it's certainly easier.
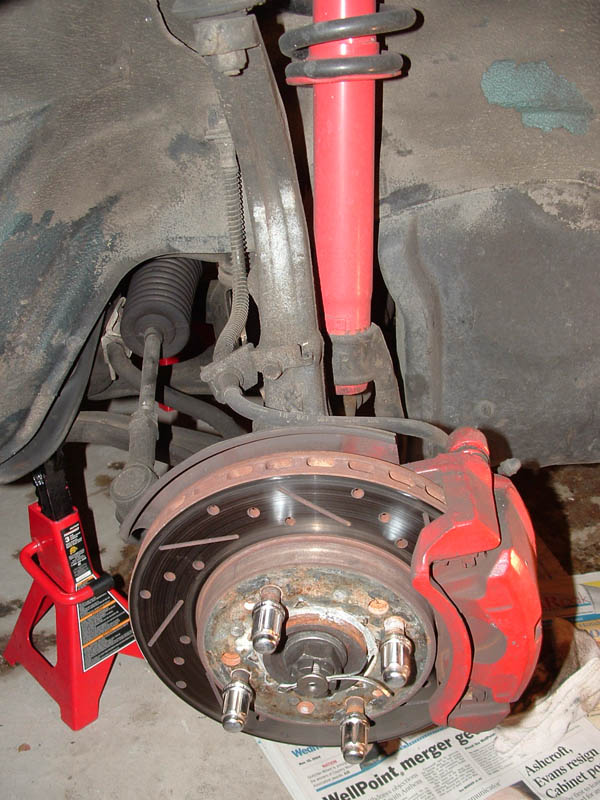
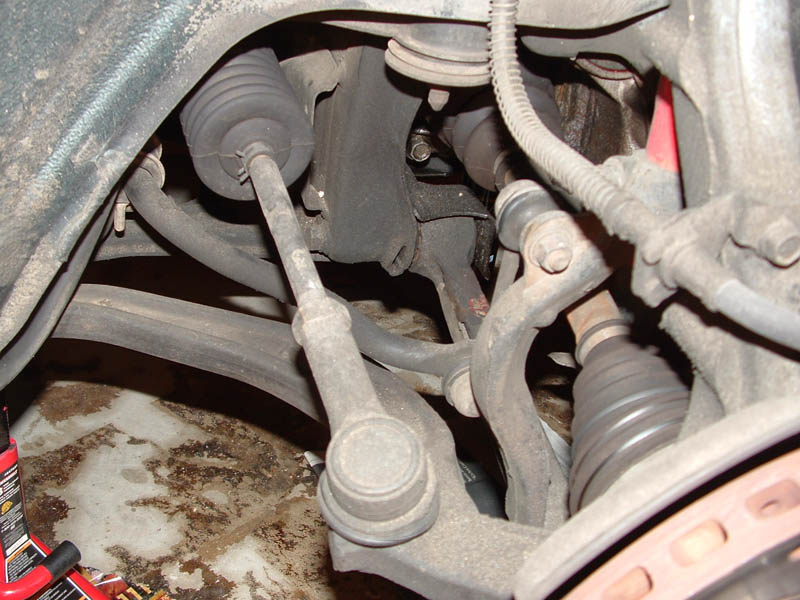 To get the axles out, you'll have to get the wheel hub loose enough so you can swing it out. To do this, unbolt the tie rod end, and knock out the tie rod's ball joint. Also remove the long bolt holding the strut fork to the lower arm. Remove the lower control arm at either the chasis or knock out the ball joint as well.
 Remove the axles. DO NOT pull them out of the tranny by grabbing onto the axle. If you do, the CV joint will come apart and you'll be in a world of hurt. Slip a screwdriver or ball-joint separator between the axle and the tranny and pry it out a bit. You can usually pull it out the rest of the way by hand. Remember to grab at the metal parts of the joints.
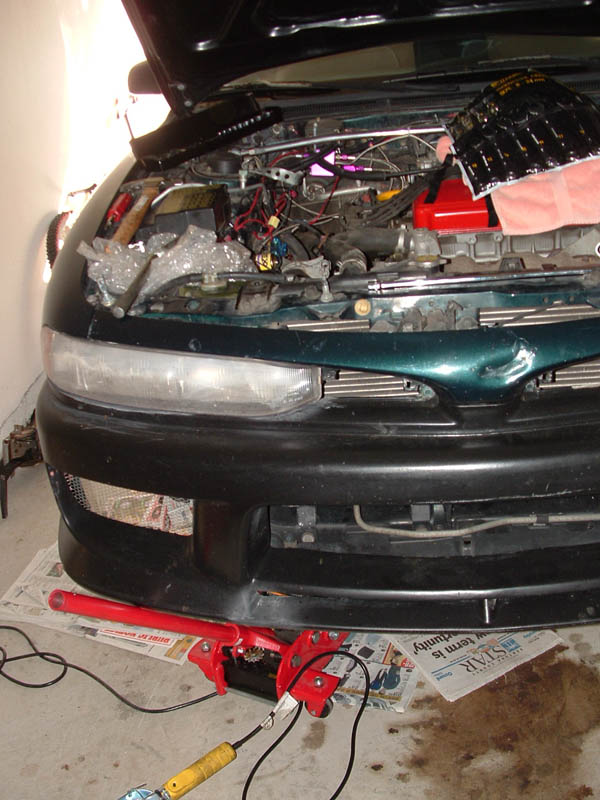 Remove your entire air intake setup, all the way back to the throttle body. Hopefully your car isn't a mess of wires like mine. Clear out the area of anything else miscellaneous.
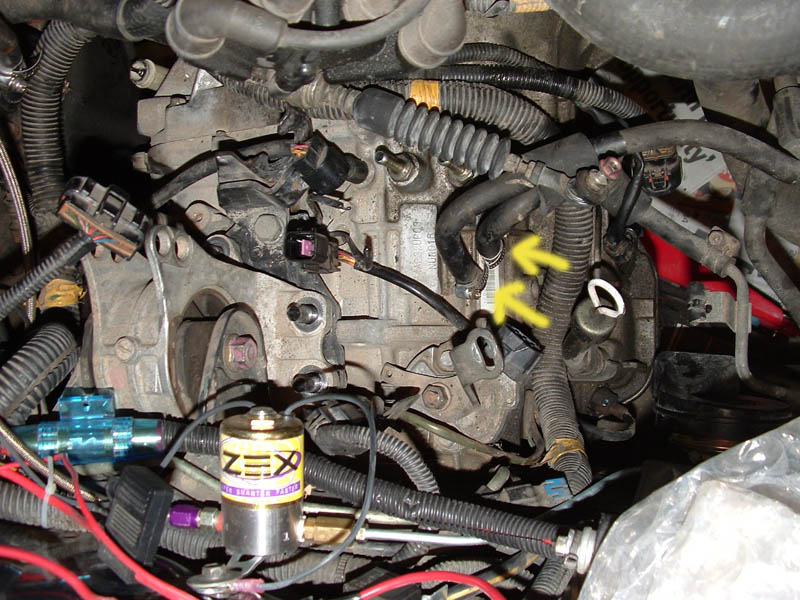 The next part will deal with removing the tranny. Remove the tranny fluid cooler lines (yellow arrows) and unplug anything electrical that goes to your tranny. Only places to look for electrical plugs are on top and on the front.
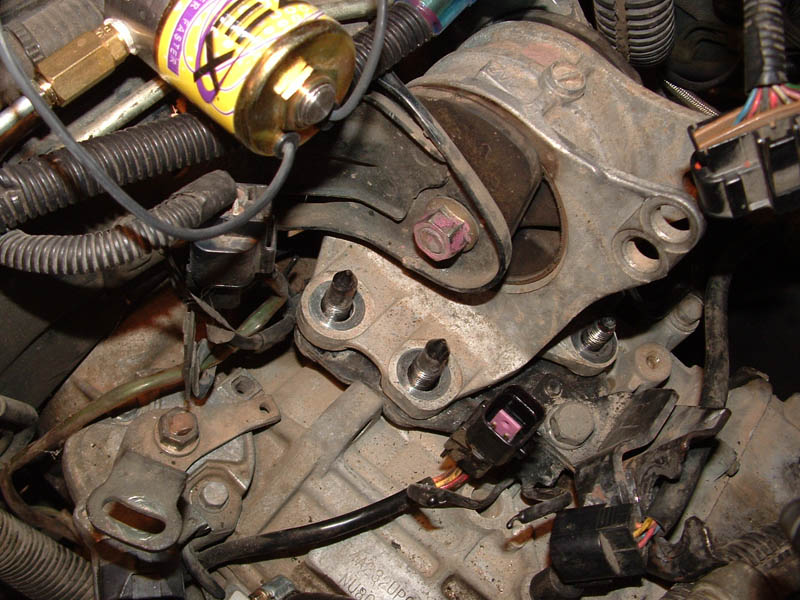
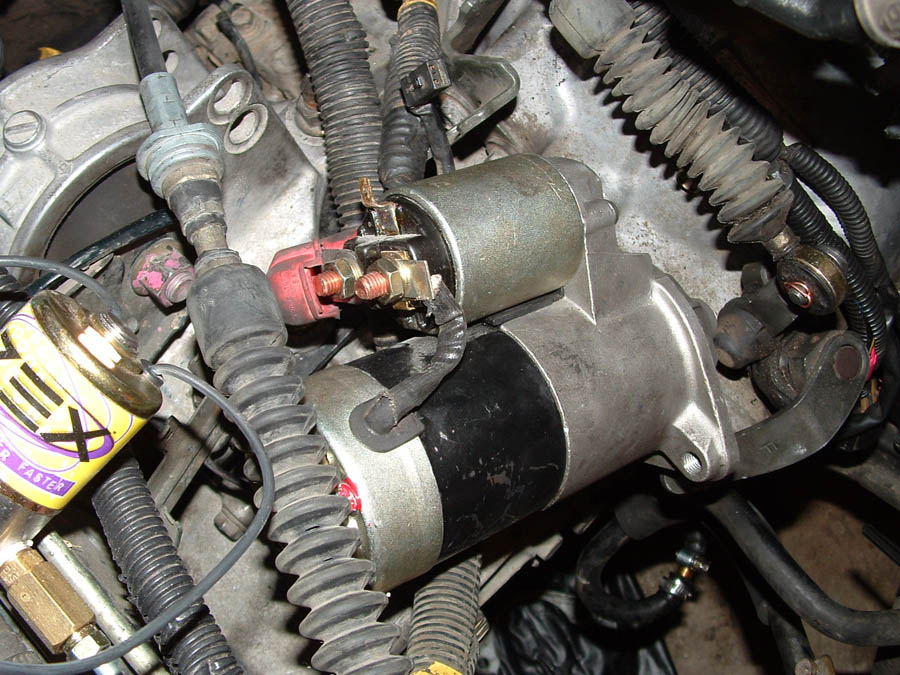 Remove the starter and the bolts that hold the tranny to the engine. Just look all along the edge where the tranny meets the engine and start taking them out one by one with a breaker bar to help. <--- Starter pictured.
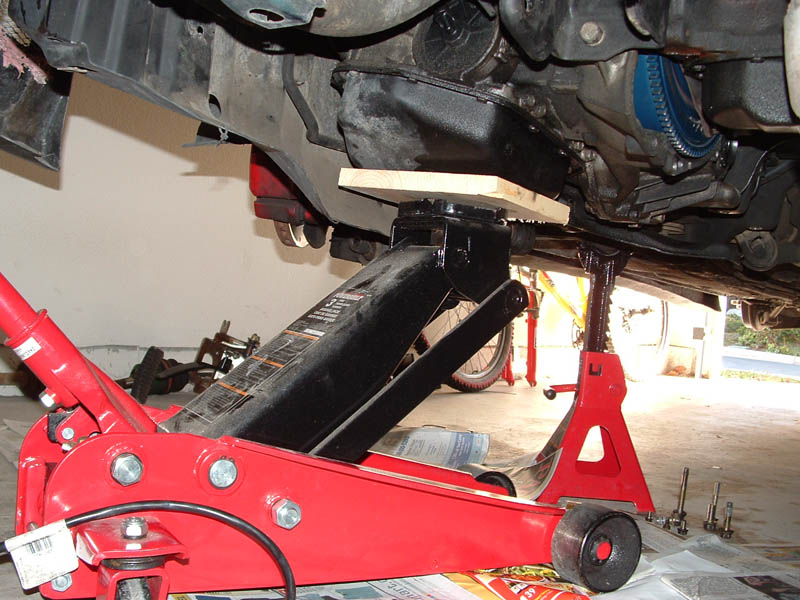 Next is to start removing the tranny mounts. You'll want to get a floorjack underneath the tranny to support it when the mounts are removed. I had to remove the center member to get the front engine/tranny mount out. Put a piece of wood between the jack and tranny so you don't mar the bottom.
 After you remove a mount, or two, you'll want to place your second floor jack underneath the engine to hold it up, so you can lower the tranny out and not let the engine rest on it's exclusive mount, which is at the driver's side. The engine shares two mounts with the tranny, and you're about to, or have removed those, so just keep the engine up on it's own from the tranny.
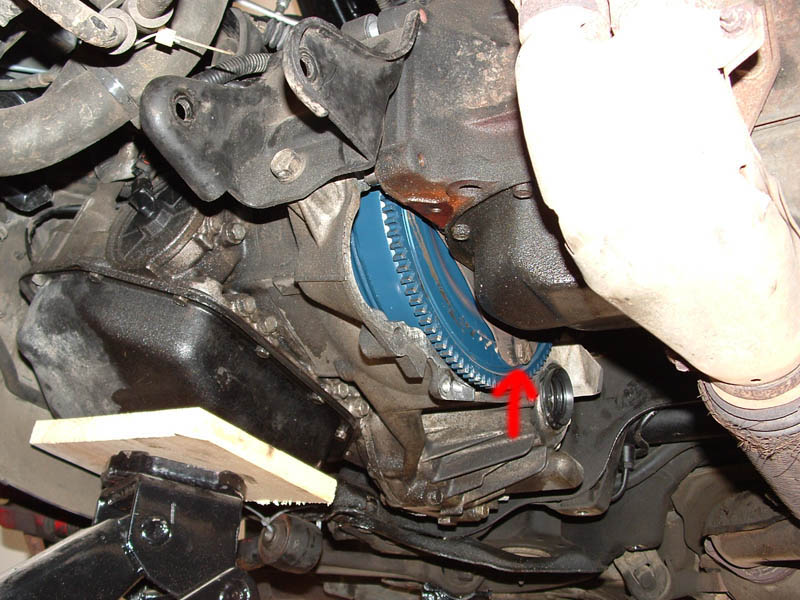 You can get the tranny out one of two ways. If you don't care about the automatic like I didn't, just lower the jack and wiggle it out and away from the torque converter and let it fall to the ground. If you want to keep it, you'll have to remove the torque converter from the crank before you lower the tranny out, so get underneath and unbolt the inspection cover. Pictured is the inspection cover removed, exposing one of the 3 bolts you need to unbolt (red arrow).
Unbolt the 3 bolts holding the triangle brace to the torque converter. One of the bolts will be exposed for sure, but to get to the other two, you'll have to rotate the crank by hand (and turning on the engine isn't an option). On the driver side of the engine you can put a half inch breaker bar onto the pulley bolt to rotate the crank, or you can turn it little by little at the torque converter. Either way, it's a pain in the ass.
After that, the torque converter will fall off inside the bell housing, and the tranny will be completely free from the block. Just lower out slowly.
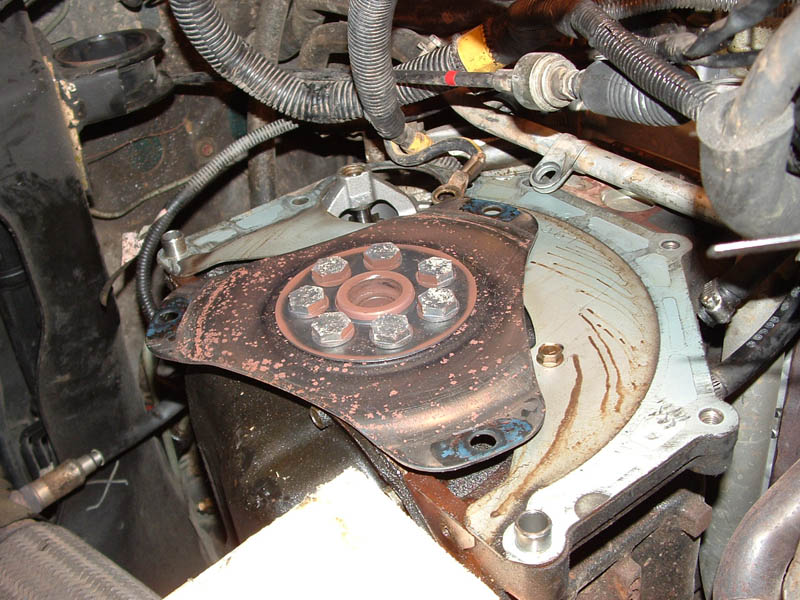 This is what you should be looking at after the tranny is gone. Remove the 7 bolts holding the triangle and circle brace to the crank. Do not strip these bolts, they are impossible to drill out. You will need hold down the crank from spinning to allow enough torque to be applied to remove the bolts. I took the automatic tranny mount, and lined up one bolt hole over the triangle piece and one over one of the holes on the block. Hope that makes sense. Everyone has their own method.
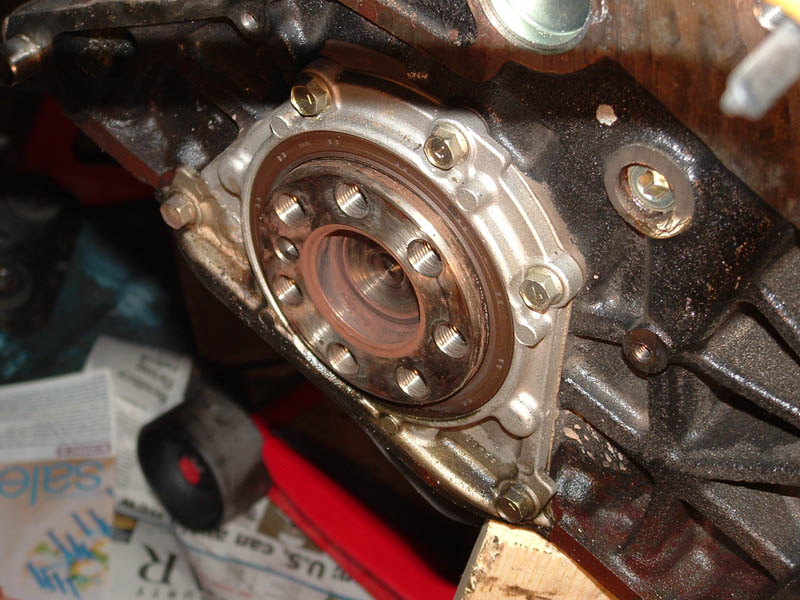
 Now is the exposed crank with this spacer in the middle hole which you'll have to remove to fit the 5spd flywheel. I used vice grips and it came out with some wiggling, but I've heard of other people having to use a torch to heat it up enough to be removed with the vice grips.
 The last thing to do before the crank is all ready, is to get some fine sand paper (400 grit or higher) and sand off the surface of the crank, then blow it out with air, if you have some. A good wipedown with acetone or rubbing alcohol should follow.
 Get the extended grade 11 bolts, and bolt up the flywheel to the crank. Torque to 100 ft/lbs. Again you'll be presented with the problem of holding the crank from spinning. I stuck a socket extension bar in between one of the holes on the flywheel and a deep groove on the engine block, worked well. Clean the shiny surface of the flywheel where the clutch will be touching with acetone or rubbing alcohol.
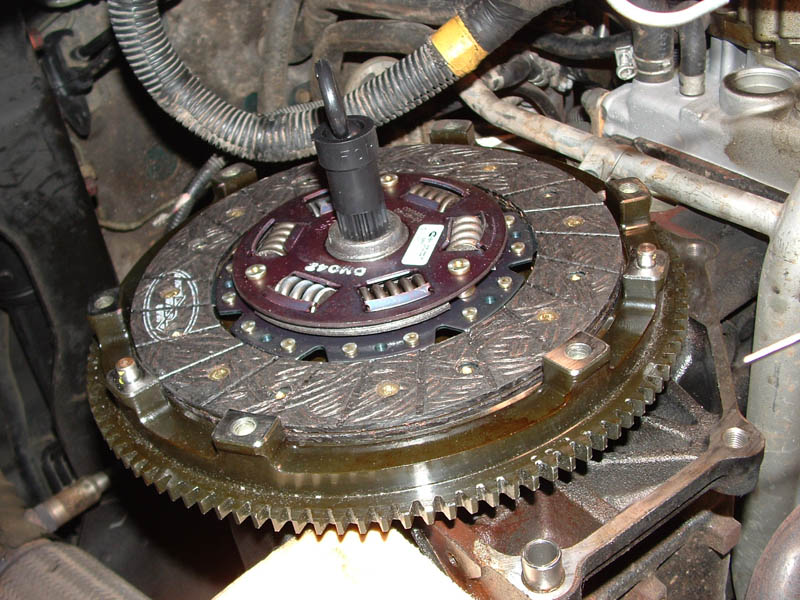 Take the clutch alignment tool and clutch, and slide it onto the flywheel. The raised side of the clutch will be facing outward, with the flat side facing in. Stick the clutch alignment tool into the middle hole of the flywheel, push in as far back as it will go.
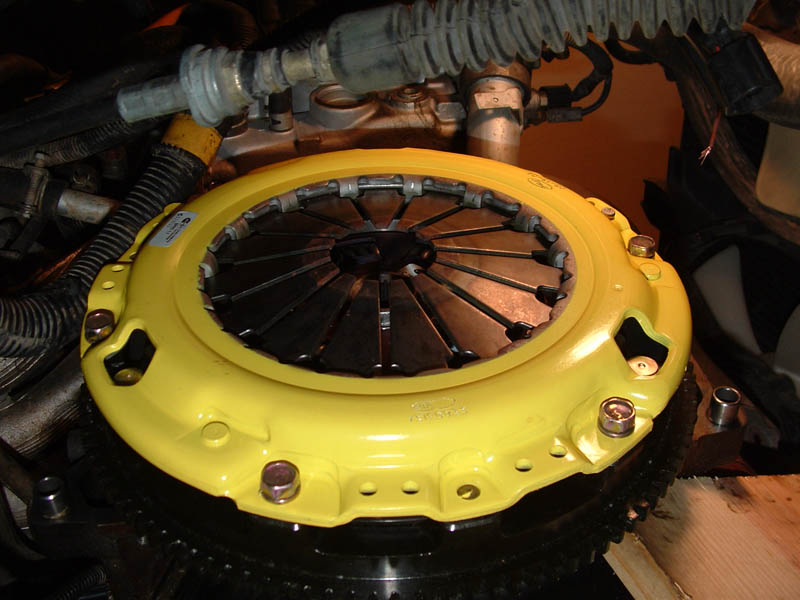 Now attach the pressure plate, and make sure to align it with the 3 pins on the edge of the flywheel. Wiggle the clutch alignment tool a few times and try to center it as much as possible between the flywheel and pressure plate. Start screwing in the 6 pressure plate bolts that mate it to the flywheel.
 Tighten the bolts one by one, and torque them to 30-35 ft/lbs. Make sure you tighten them little by little, going around in the circle. After you torque them, going in a criss-cross pattern like you would with lugnuts, go over them a bunch of times. Often enough, torquing the other bolts down will raise some pressure off the ones you just torqued, so make sure to go over them several times. Be very meticulous here. When you're done, the steel teeth on the pressure plate should be flat (pictured). Don't worry about the crank spinning, you can hold the flywheel with your free hand while torquing the bolts.
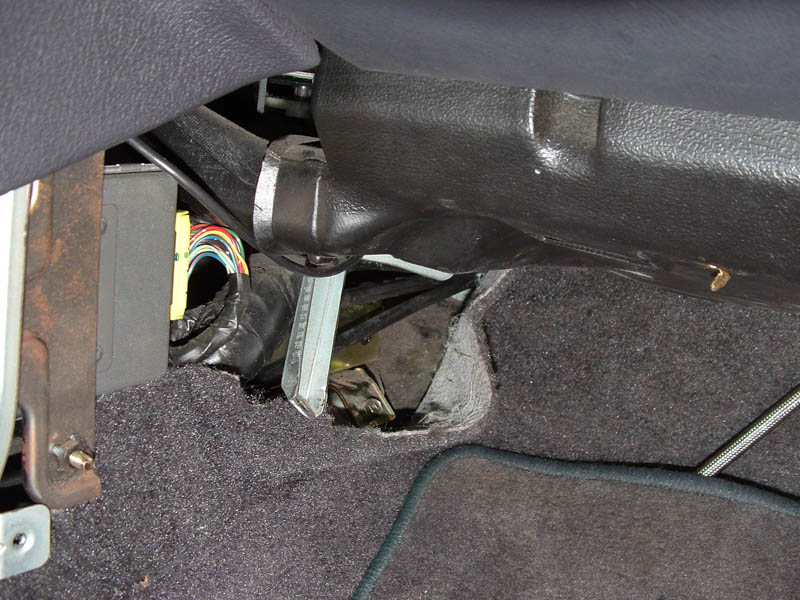
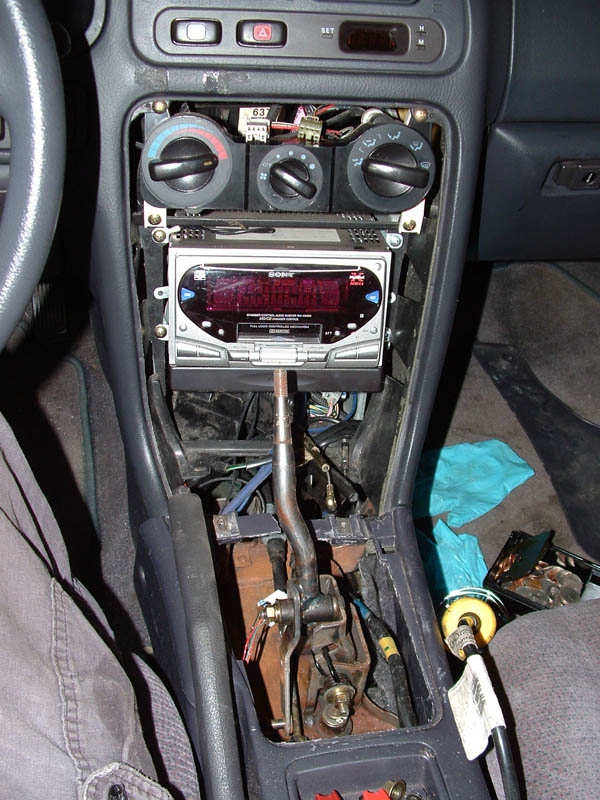
 Now's a good time to install the cables. You don't want to be doing this with the tranny in the car. I cut some corners here; I dremmeled the automatic shifter cable at the firewall, and just pulled it through from the cabin and from the engine bay. I then used pliers and a razor to cut out the thick rubber seal that used to surround the shifter cable. Then I fed the two manual shifter cables through (pictured).
 Getting them from the firewall to the shifter location is a bit tedious, but removing the kick panels makes the job easier. Just pretend you're trying to get to the ECU.
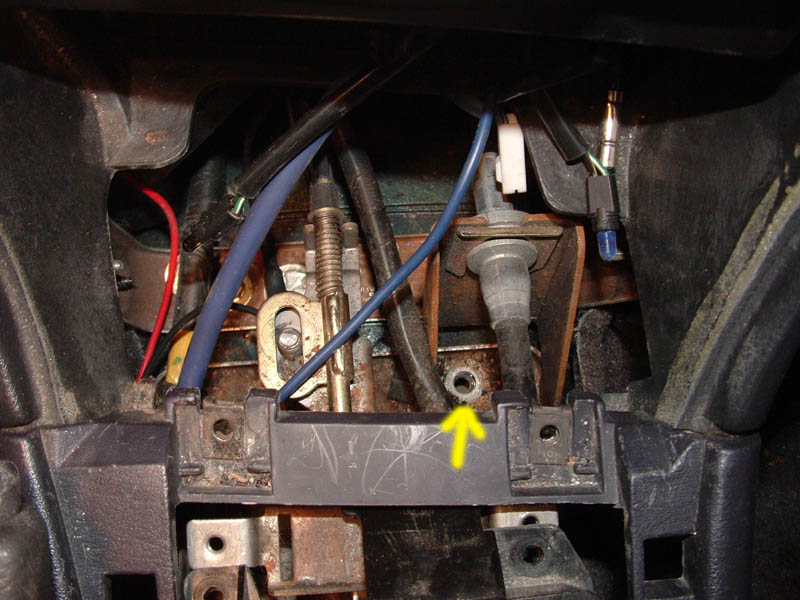 Since you're inside the car, might as well work on the shifter assembly. Remove the auto shifter bezel and the dash trim. Remove the 4 bolts that hold the auto shifter assembly to the floor. Yellow arrow on one of the bolt holes.
 Removed.
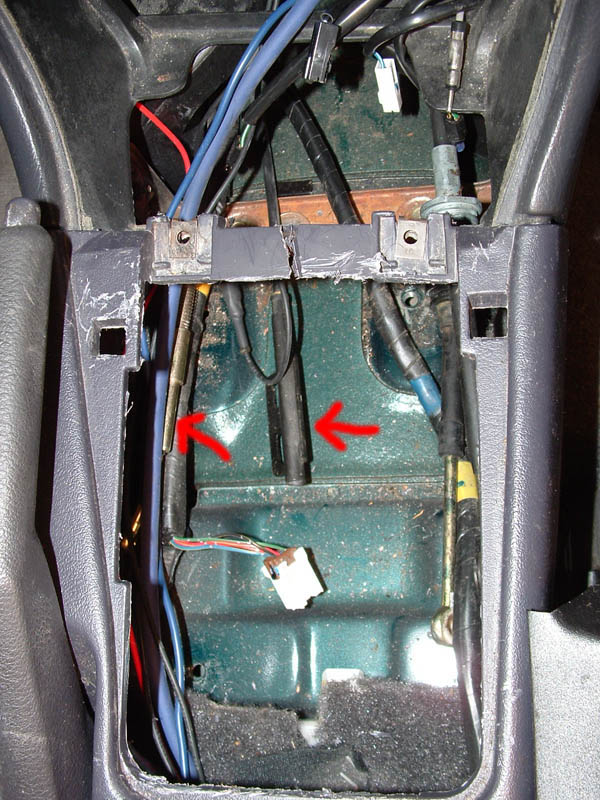 After you remove the auto shifter assembly and the shifter cable, there will be some electrical wires and two mechanical cables remaining (red arrows). The two mechanical cables can be removed. I dremmeled them off and pulled them out. One of them runs to the automatic brake pedal, and lets the auto shifter engage out of PARK when the brake pedal is depressed. The other cable runs somewhere behind the dash and prevents you from taking your key out when you're in any gear but PARK, and also prevents you from putting the car into any gear unless you have the key in and to the ON position.
 Installing the 5spd shifter is a lot easier than getting the auto shifter out for some reason. Make sure all wires and plugs are clear from underneath so you get a solid bottom underneath the shifter. Install the 4 bolts to mount the shifter to the floor. You need longer ones than what the automatic used, OR you can dremmel off the two washers that are on each bolt from the automatic shifter. I used a combination of both bolts.
 Install the shifter cables. You might have to switch them like i did, so don't bolt everything back up. I have the cable with the silver-finish on the passenger side, and the one with the black-gloss finish on the driver side. Might be different for others. Slide one shim per cable in between the shifter cable and shifter assembly to keep them tight.
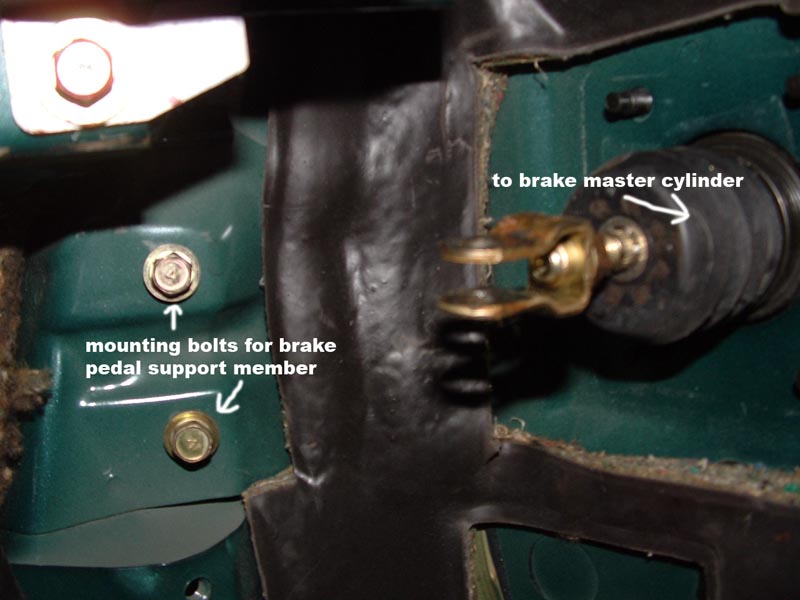 Now to remove the old brake pedal, and install the new one and clutch pedal + master cylinder. Look up underneath, and remove the cross bolt holding the brake master cylinder fork to the brake pedal. Then remove the 4 bolts holding the brake pedal support member. You should have what's <----pictured after that.
 There will be some pre-cut firewall packing next to the brake master cylinder. Pry then rip it out. You should have what's pictured.
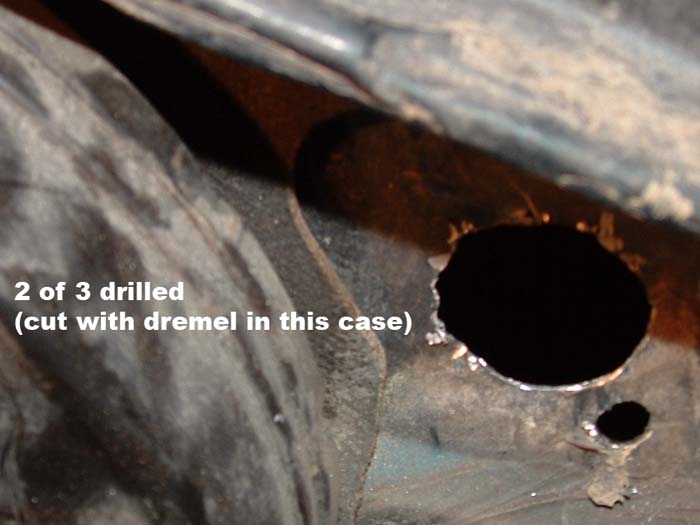 Start cutting out the 3 holes by whatever means best suit you. I tried using a hole-saw but I couldn't get it in there comfortably, so I bust out the handy dremel and after a few busted bits, got the holes done.
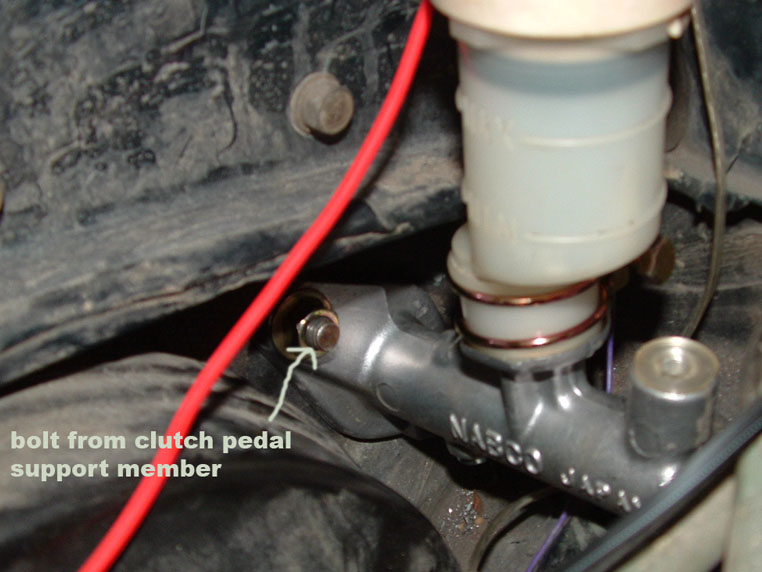 Install the clutch pedal support member by feeding the master cylinder from the engine bay. They'll mate up and share the bolts. Bolt them really tight together, and connect the master cylinder fork.
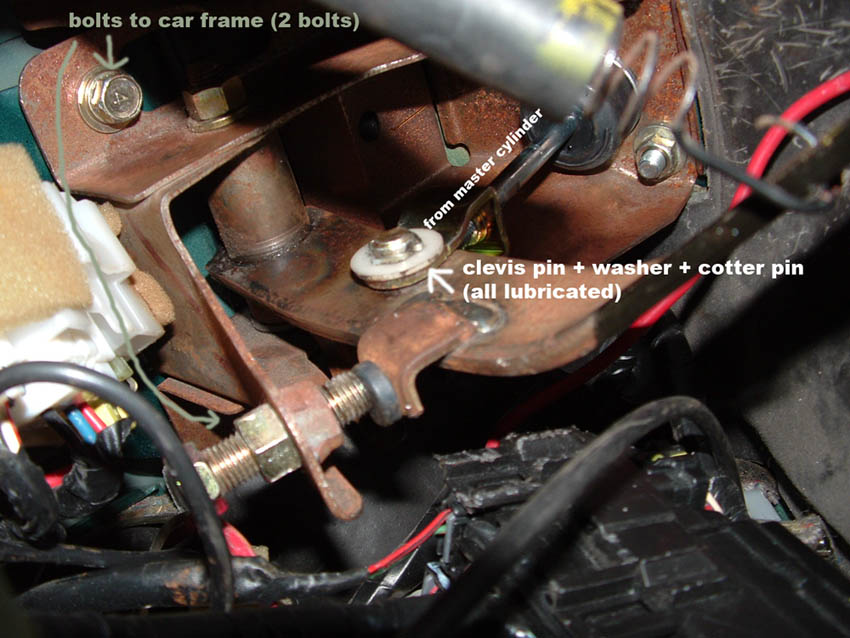 Installed. Don't screw with any of the stops yet or the master cylinder adjusting nut.
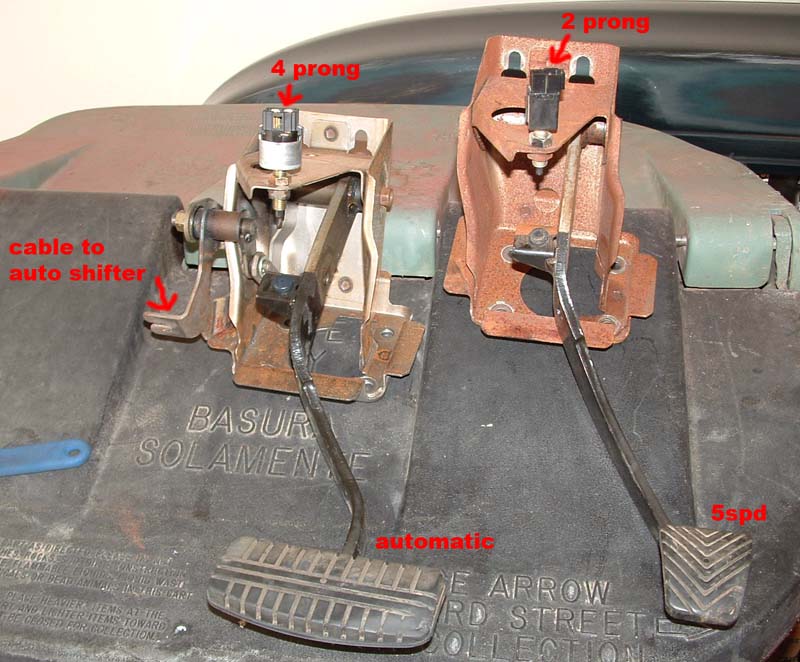 Install the manual tranny brake pedal. Comparison pictured. Notice the different prongs. On my 94 ES, they had a 2-prong and 4-prong connector on the same wire, so hooking the brake lights back up should be easy. You might have to make a new harness, look hard for the other prong though. I guess the 2 prong means no cruise control?
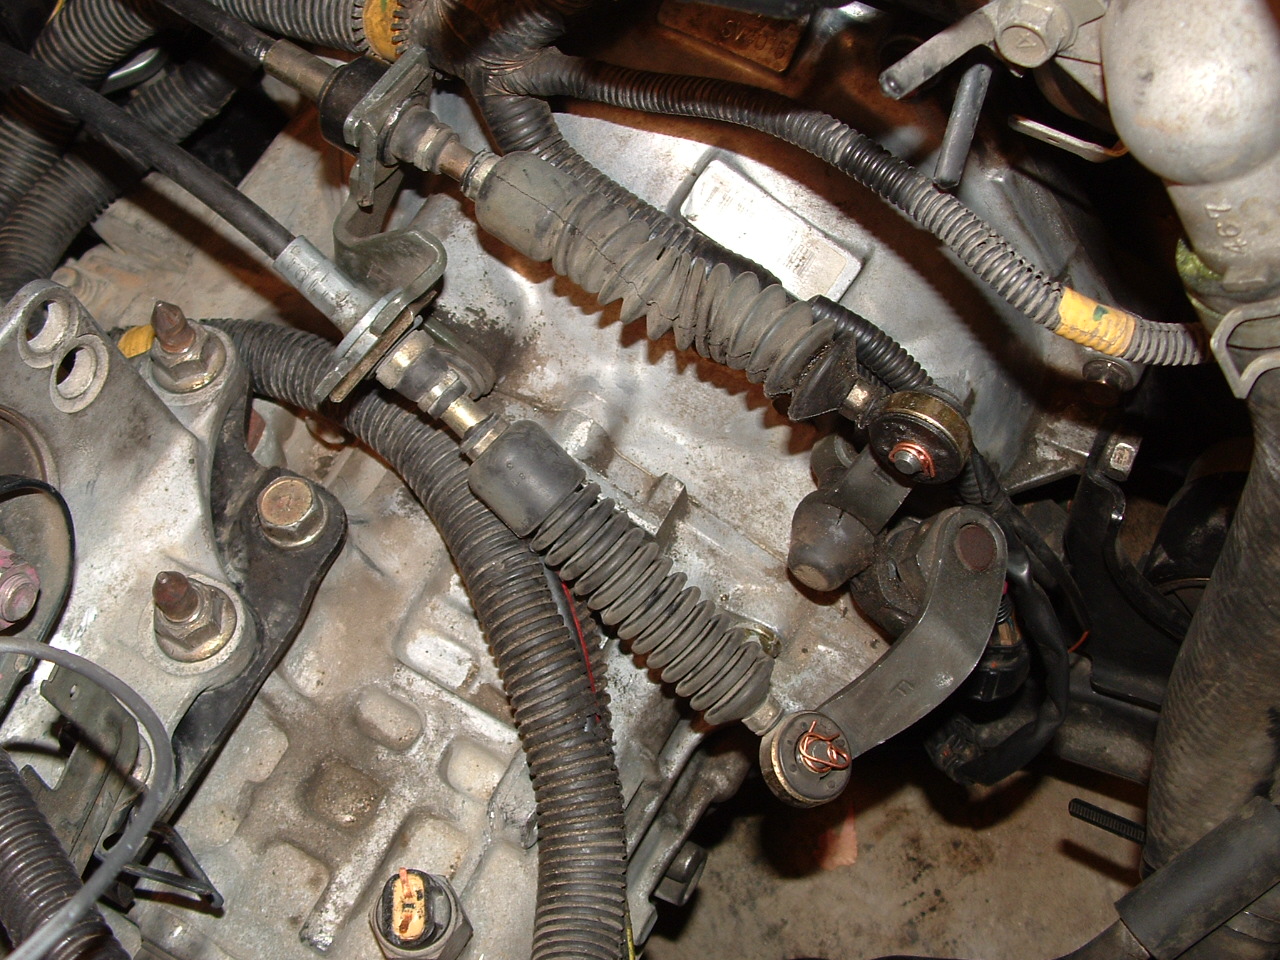
 Now you're done inside the cabin. Get the manual tranny and install the new throwout bearing and apply grease to the part of the shaft it will be touching. Also grease the ball joint that pivots the fulcrum fork (ball joint and fork pictured). It's recommended you buy new ones.
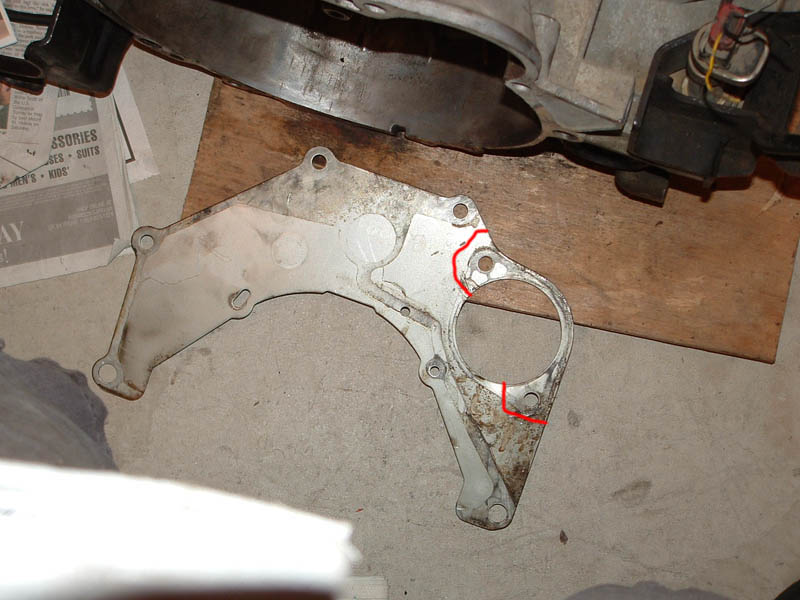 Now for the backing plate. You might not have to do this, but everyone I've talked to had to. You can either buy a new backing plate from the dealer, or modify your existing one like everyone else has done, including myself. I dremmeled along the red lines, and this allowed the backing plate to be installed against the block via the dowel pins. While installing the starter, you'll have to install the starter-plate at the same time.
Slide on the backing plate to the dowell pins. Bolt the new manual tranny up to the block. Easiest way I found, was to put the tranny in at an angle, with the bell housing higher up than the other end, so you can slide it up to the crank, then bring the other end up. It's a bitch. Get a helper for this part.
To get the jack out from underneath right away, attach the "new" side tranny perch to the tranny, then bolt it to the side mount. Do the same for the rear. Install the speed sensor while you're down there.
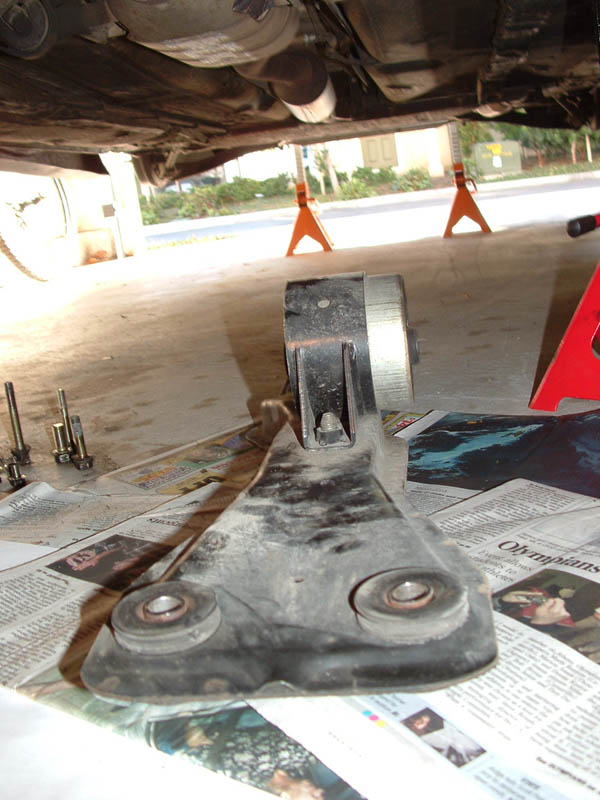 After two mounts, you'll be ok to remove the floor jack. Align the tranny to the block, and make sure the dowel pins are aligned so you're not crying about your busted clutch in 500 miles. Put all the tranny-to-block bolts in, but don't tighten. Just thread them in for a couple of turns. Install the center member (pictured) back in, and attach that mount as well.
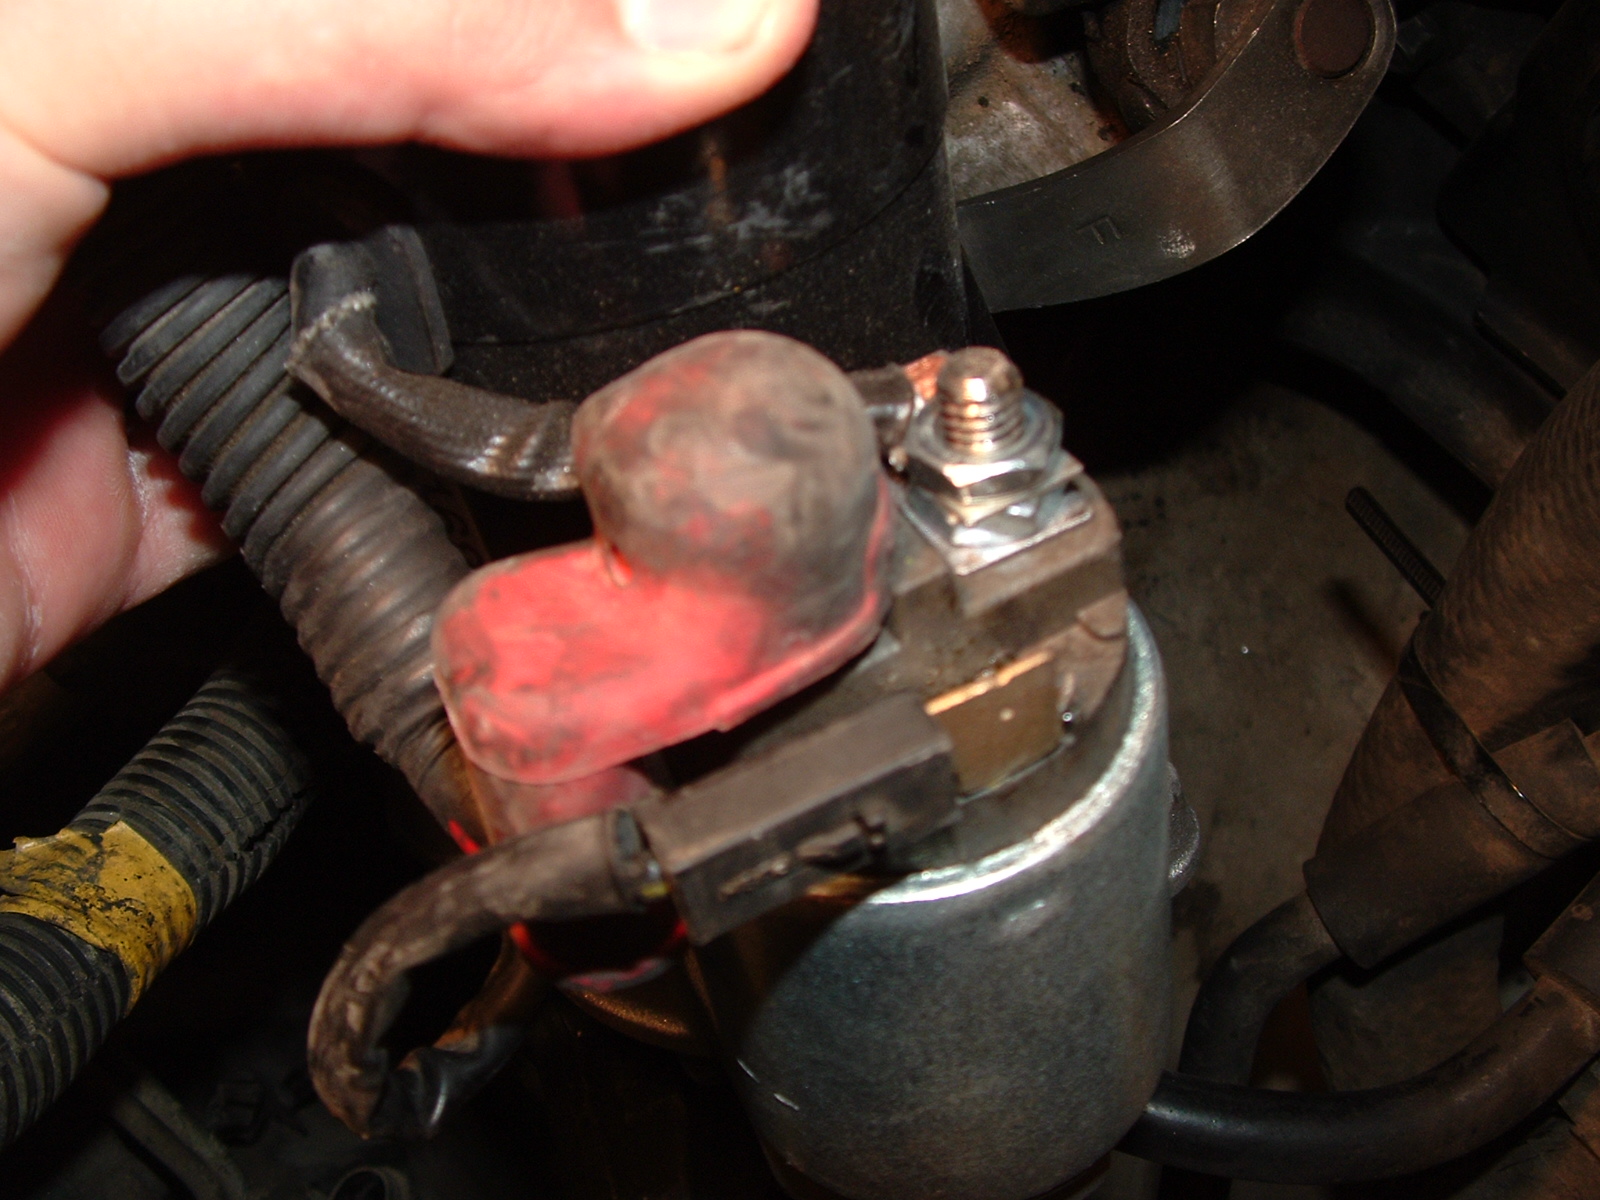 Start tightening and securing everything. Bolt on the manual tranny starter. Use the custom made starter-plate if you fabricated one to go between the tranny and starter. Don't forget about the ground strap that feeds off the starter cables, slide one of the tranny bolts through it. Also, remember to keep the same connections in the same place (pictured).
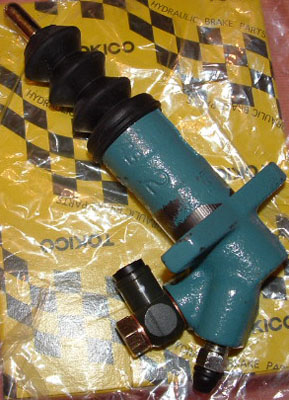 Install the slave cylinder (pictured). The clutch fork will be sticking out of the tranny, and you can figure out how the slave bolts up to the tranny using it's own two really long bolts. Tighten the slave down, and make sure the push-rod is hitting the concave part of the clutch fork.
Run your clutch line from the master to the slave cylinder. If you're using the mitsubishi OEM setup, with the 2 hardlines and 1 soft line, you can find the diagram in the service manual pages (linked above). I HIGHLY recomend NOT building your own SS teflon clutch line, and buying the machined SS line from Slowboy Racing. Click here.
Fill up the master cylinder with Dot 3 or 4 brake fluid, and start pumping the clutch pedal with the bleeder valve opened on the slave. You want to keep pumping until there are no air bubbles coming out of the bleeder valve. Make sure to keep the master cylinder full while bleeding the valve, or else you'll empty it and put air back into the line, completely undoing what you just did. Fill up the master cylinder to the MAX line when you're done.
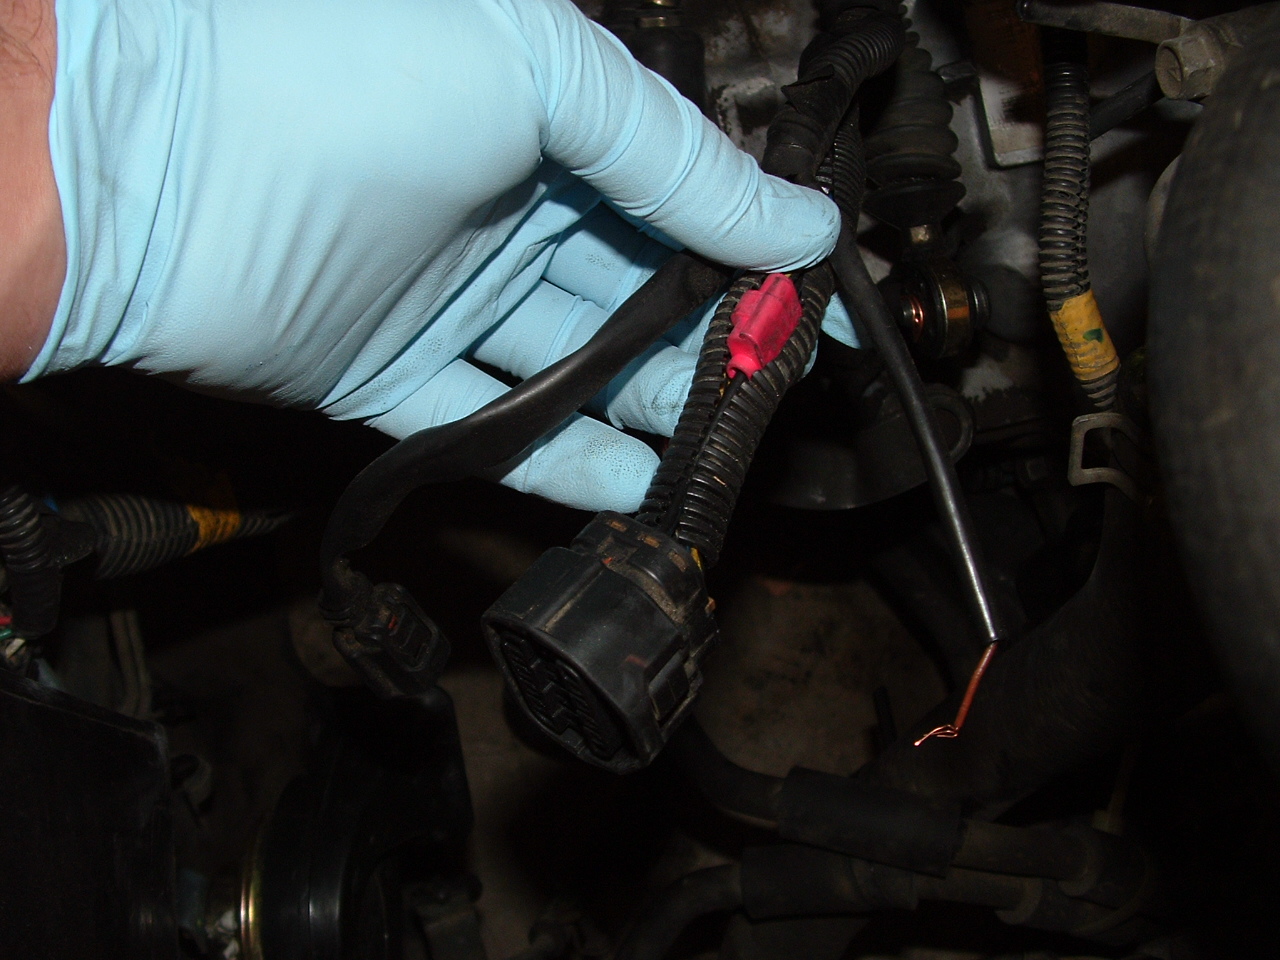 To get the car to start, you'll have to cross the two main big black wires on the inhibitor plug. It's the biggest plug that went to the auto tranny (it doesn't go anywhere now) but you'll need to cross those two wires so the ECU will let the engine start.
 Fill up the "new" transmission with 2.2 quarts of tranny fluid. OEM specifications require Hypoid 75W-90 or 75W-85W, so you'd have to get that at the dealer if you really want it. Use BG Syncro Shift I or II for a much bigger improvement. It's cheaper too so there's no point in using OEM fluid.
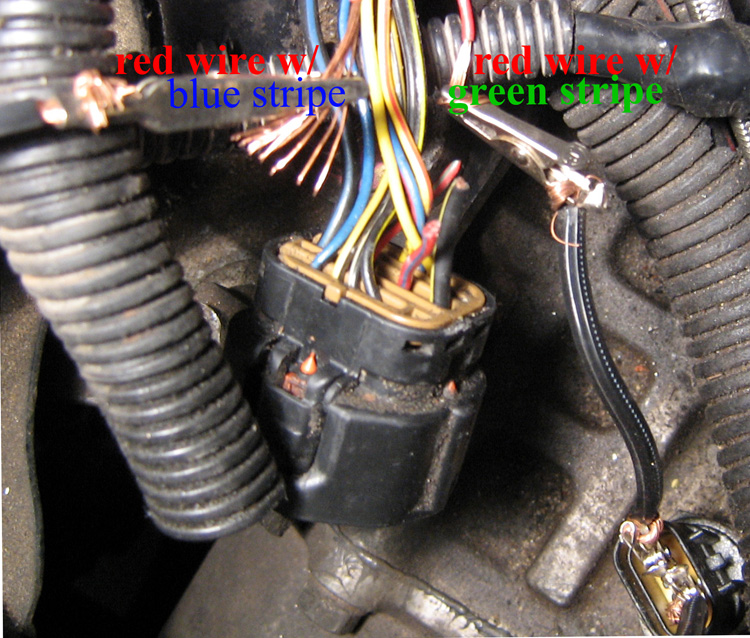 Update 5/21/08 - To wire up the reverse switch on the new tranny, splice into the same inhibitor plug that you had to hack into to get the car to start. It doesn't matter which way you wire them to the reverse plug on the tranny, but splice into the red wire with green stripe and red wire with blue stripe, and wire each one to their own terminal on the reverse plug.
Your reverse lights should light up now! Click here to see a wiring diagram: 
You're now ready to go out for a test drive. Remember to reconnect your battery and don't start the car in gear. Right out of the box, the master cylinder isn't even close to being in spec, so you'll need to crawl under the dash and adjust the push rod to get the friction point of the clutch near the top of the pedal's travel. The clutch is not supposed to engage right off the floor.
peanotation@gmail.com